Posted on: August 10, 2017 | 3 min read
The advantages of leveraging cloud technology have piqued the interest of many companies in today’s market. For that reason, more and more data warehouse and business intelligence solutions are being built on cloud-based servers rather than on-premises. This blog will detail how to provision a Windows virtual machine in Microsoft Azure. It will also include some commentary speaking to this author’s review of the current Azure user experience. It will not detail the steps to acquire an Azure portal credentials.
Provisioning a VM:
1. Navigate to portal.azure.com and log in to the Azure portal.

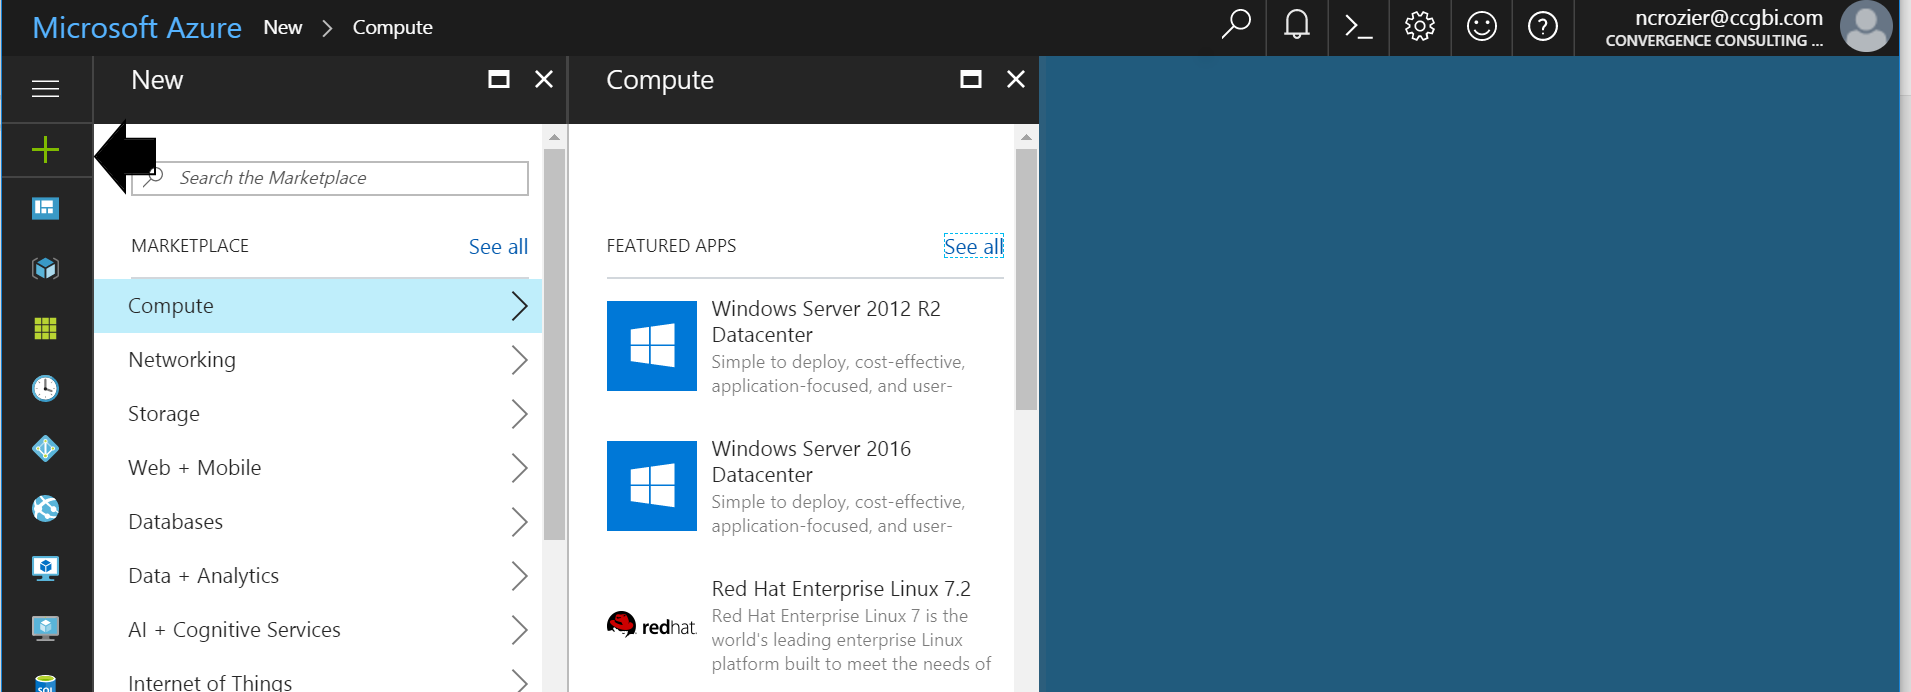
2. Select the new icon indicated below, and then select Compute. There are multiple operating systems to choose from, but for the purposes of this blog we will be spinning up a Windows Server 2016 Datacenter.
3. Once the server is selected, you will be directed to the following screen.
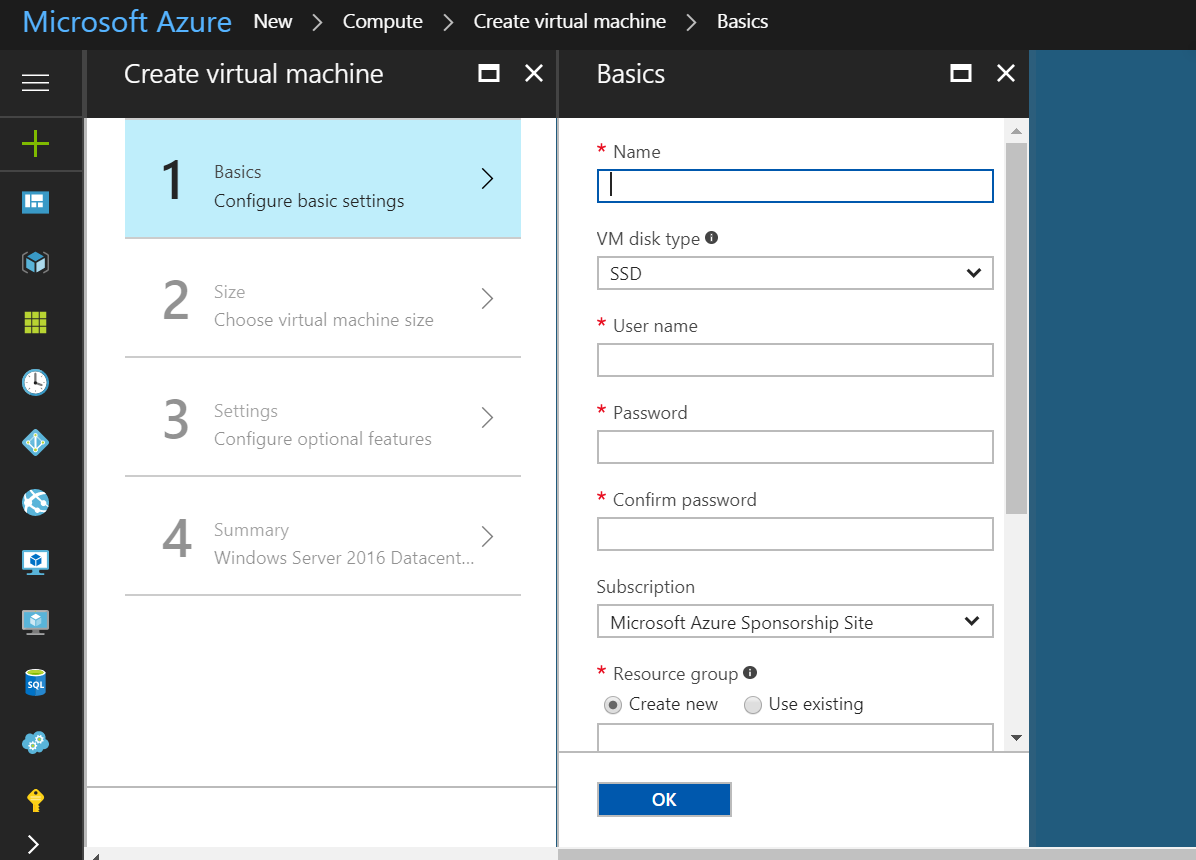
The information here will dictate the server name and the global administrator credential. If you are standing up multiple VM’s to be included in the same domain, you also might consider whether creating one resource group or multiple is appropriate. A resource group is a collection of resources that share the same life cycle, permissions and policies. For more information on resource groups, Microsoft has created some useful documentation here.
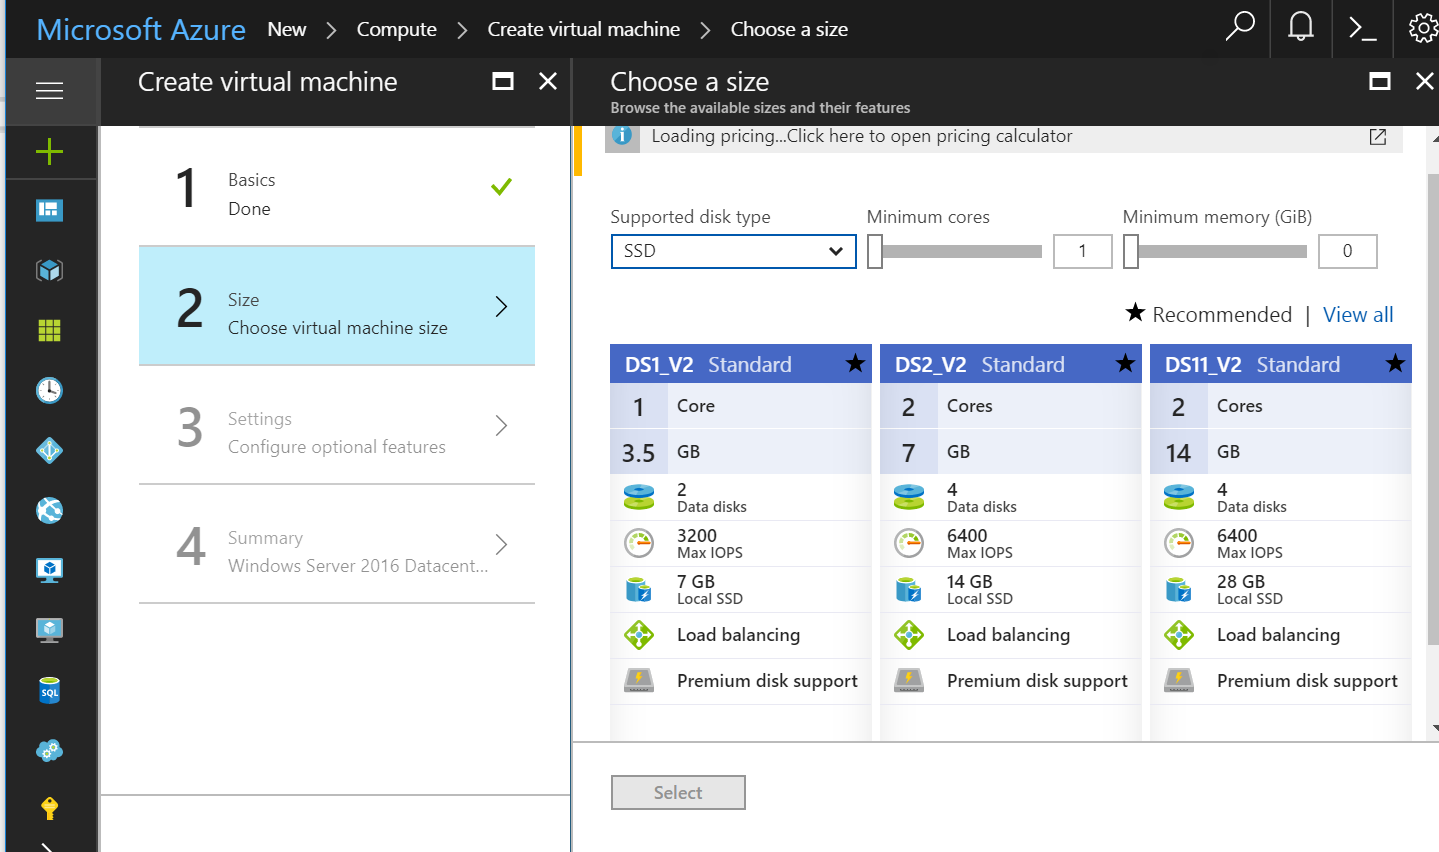
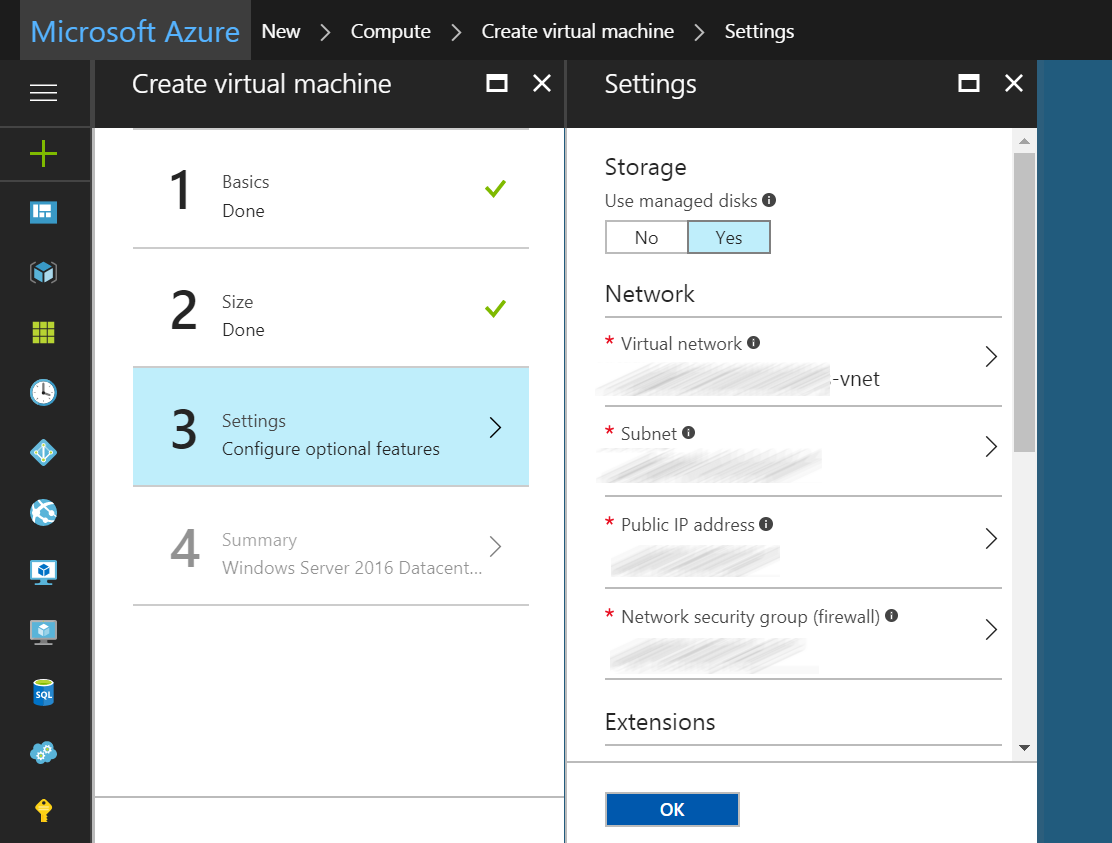
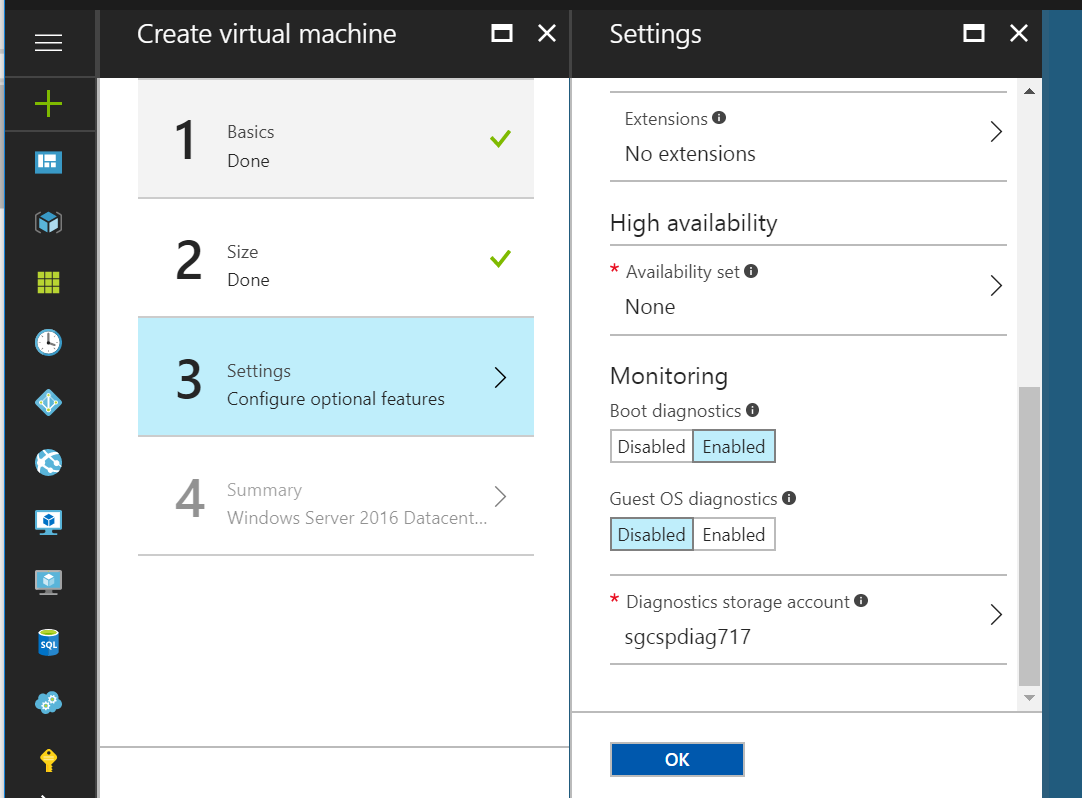
4. The next steps include selecting the appropriate size virtual machine, opting to configure some optional features, and reviewing a summary of your selections.
Keep in mind as you are reviewing the below sub-steps, that this is an area where the advantages of using Azure VM’s opposed to on-premises server are apparent. VM’s are scalable, so should a server size need to be adjusted in the future, this can be done relatively easily. Determining the appropriate server size no longer needs to consider forecasted future needs. Additionally, the following steps are representative of the only configuration necessary to provision a fully functional server and operating system.
a. Choose virtual machine size.
b. Configure optional features
c. Summary of Selections

5. Once you’ve selected ‘OK’ in the screen shot above, your virtual machine will be provisioned. This process usually takes between 1-5 minutes.
This brings me to another key advantage of utilizing Azure VM’s rather than an on-premises server. It can take weeks to provision an on-premises server. Great care must be taken to provision the correct size server, then the company must wait for the hardware to arrive. Once it has arrived, multiple resource hours will be spent configuring the server. Only at this point will a fully functional server and operating system be in place. Compare this to the 15 minutes or less spent on the Azure portal, and the benefit is clear. Microsoft’s Azure virtual machines are secure, available at or above SLA agreement standards, and reasonable priced when compared to on-premises total cost of ownership estimates. This is a technology that I expect to see more and more of in the coming months and years.
Contact a Cloud professional at info@ccganalytics.com or (813) 265-3239 to see what migration method works best for your company’s needs.
Topic(s):
Cloud
Return to Blog Home